After initial development of your android app, you are ready to get your app out door for additional testing. This can be done using number of ways, but if your final goal to publish your app in Play Store then you should use Play Store for beta testing. Follow these simple steps to publish it as Alpha/Beta Testing
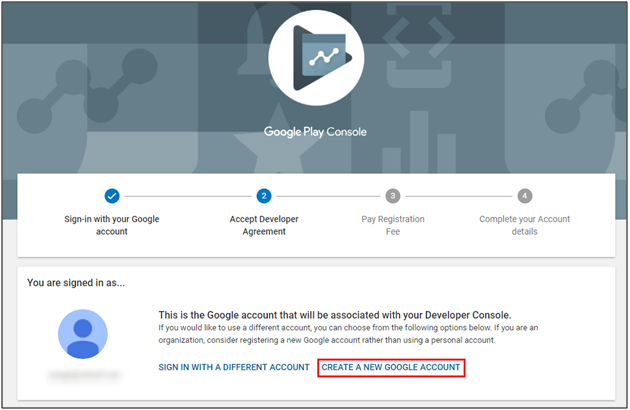
Create a developer account in Google Play Console
The very first step for app publishing is to make an active developer account in Google Play Developer Console. Choose Developer name which represents your business on Google store, and enter basic account details. It takes around two days for your account to be verified and registered by Google.
Link your Merchant account
If your app is a paid one or includes a subscription option, you will have to interlink your developer account and Google Payments Merchant Center with each other. It is used for tax or financial identification as well as for monthly payout from the sale. You can easily set up your Google Payments Merchant Center account if you don’t have one with following steps:
- Sign up for the Google Play Developer Console
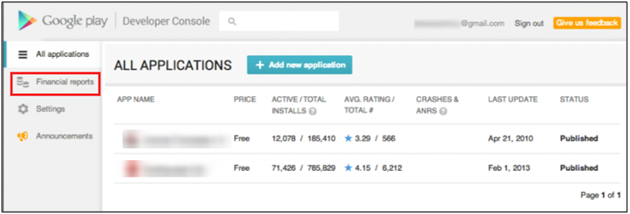
- Go to Financial reports
- Create a Payment account
Upload your app
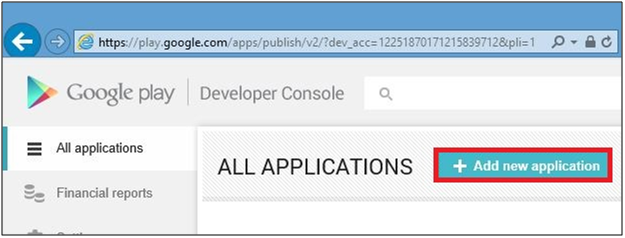
Upload your android app with Add new application option. Enter Default Language and title of your app. After entering details, click on upload APK button and you will be redirected to your app’s homepage. Google Play Store takes time for uploading the app. The upload time depends on your app size, meanwhile, the app stays in drafts.
Alpha and beta app testing
It is paramount to test your app before publishing it. It is better to get the feedback of your app with a sample of end users. Google Play itself provides you with an option to test the application.
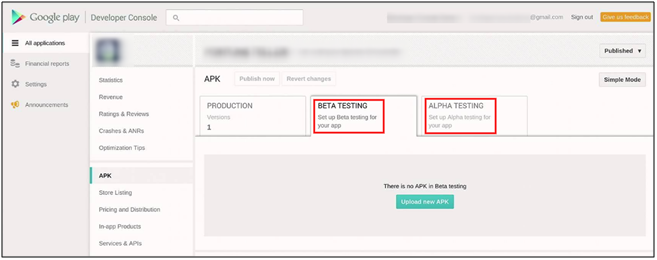
In the APK of the Developer Console, there are options for Alpha Testing and Beta Testing. After uploading the APK file of your app, few URLs are received which can be shared with the testers. With these links, the users can download the app and provide reviews and feedback related to it. You can refine your app as per the feedbacks, and optimize it for better performance.
Enter Store listing details
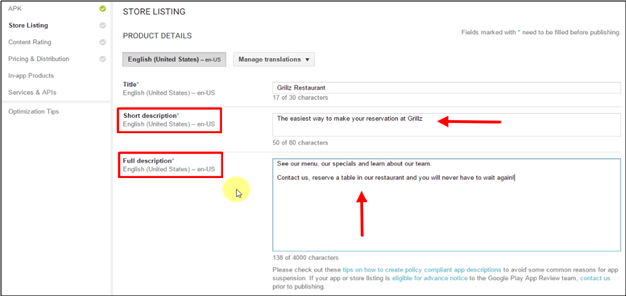
Your app page plays a very vital role in attracting Android users. Keep its details compact and precise. After uploading APK file, go to store listing page and add following details related to your application:
- Full description ( up to 4000 characters)
- Short description( up to 12 to 80 characters)
- App snapshots
- Promo video
You can also provide details such as contact, category, and more. These store listing details can be updated whenever required.
Add pricing and distribution details
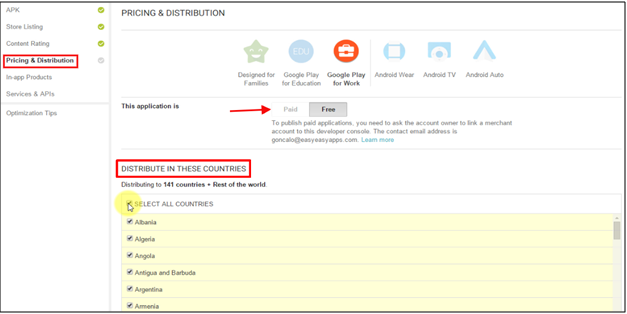
Now come pricing and distribution details. Enter the price of your app with following steps:
- Select whether your app is free or paid.
- Select the targeted countries.
- Check the boxes stating that your app complies with the content guidelines.
Save the details and further move on to the next step.
There are a few extra options are available that might not be mandatory while publishing the app, but they surely prevent your app from getting negative feedback. Also, you can manually filter non-compatible devices. So, use these options to curb out any negativities and stay at the top of your game.
A well crafted Google App page is a key to your app’s success. With above-discussed points, it is quite clear that publishing an app on Google Play Store is a simple process and just require few minutes. So, go ahead, publish your app and reap out benefits of Google Play Store.


